2. Organising your desktop
Introduction As you work with your text in Paratext 9 you will want to see a variety of resources. In this module, you will learn how to open resources and organise your desktop.
Before you start You are getting ready to type text into an existing project. Before you can do this, someone must have already installed the program, created a project for your data and installed resources for you.
Why is this important? The translator who organises his/her desktop well has all the resources necessary for his/her work.
What are you going to do? You will start the Paratext 9 program and open a previously saved layout (text combination). If needed you will open other resources, change the arrangement of the windows and resave the text layout.
There are a number of videos available to help you with the different types of resources and arranging the windows. Below are some suggestions. Click on the link to see the video.
0.2.1b Basics of Projects and Resources
0.2.1d How To Arrange Windows
0.2.2a How To Open And Modify A Text Collection
0.2.3a How To Control Which Windows Scroll Together
0.2.3c How To Swap A Text In A Window
0.2.3d Further Tips On Arranging Windows
Changes in Paratext 9
The menus changed in Paratext 9.0. To see the menu, you now need to click on the menu icon ≡. There are now two types of menus.
The main Paratext menu is on the title bar. Each window (or tab) has its own menu.
![]()
![]()
When you click on one of these menu icons all the menus are displayed, and you just need to click on the command.
In this manual, when it says ≡ Paratext, under Menu > Command (e.g. ≡ Paratext, under Paratext > Open). It means click on the Paratext menu icon ≡, then under the menu (e.g. Paratext) choose the command (e.g. Open).
And when it says ≡ Tab, under Menu > Command it means click on the tab menu icon, then under the menu (e.g. Tools) click on the command (e.g. Wordlist). The most common Tab is the project menu so it may just say ”≡ project menu”.
2.1 Load the program
Double-click on Paratext 9 icon on the desktop

- OR
(From the Start menu, choose Paratext 9)
2.2 Open a saved layout
In 9.4 there are some improvements to manage layouts. Your recently used layout should be at the top of the menu.
For more details watch What's New in 9.4 - Main menu - Manage Layouts
Click the ≡ Paratext menu, then under the Layout menu
Choose a saved layout (text combination).
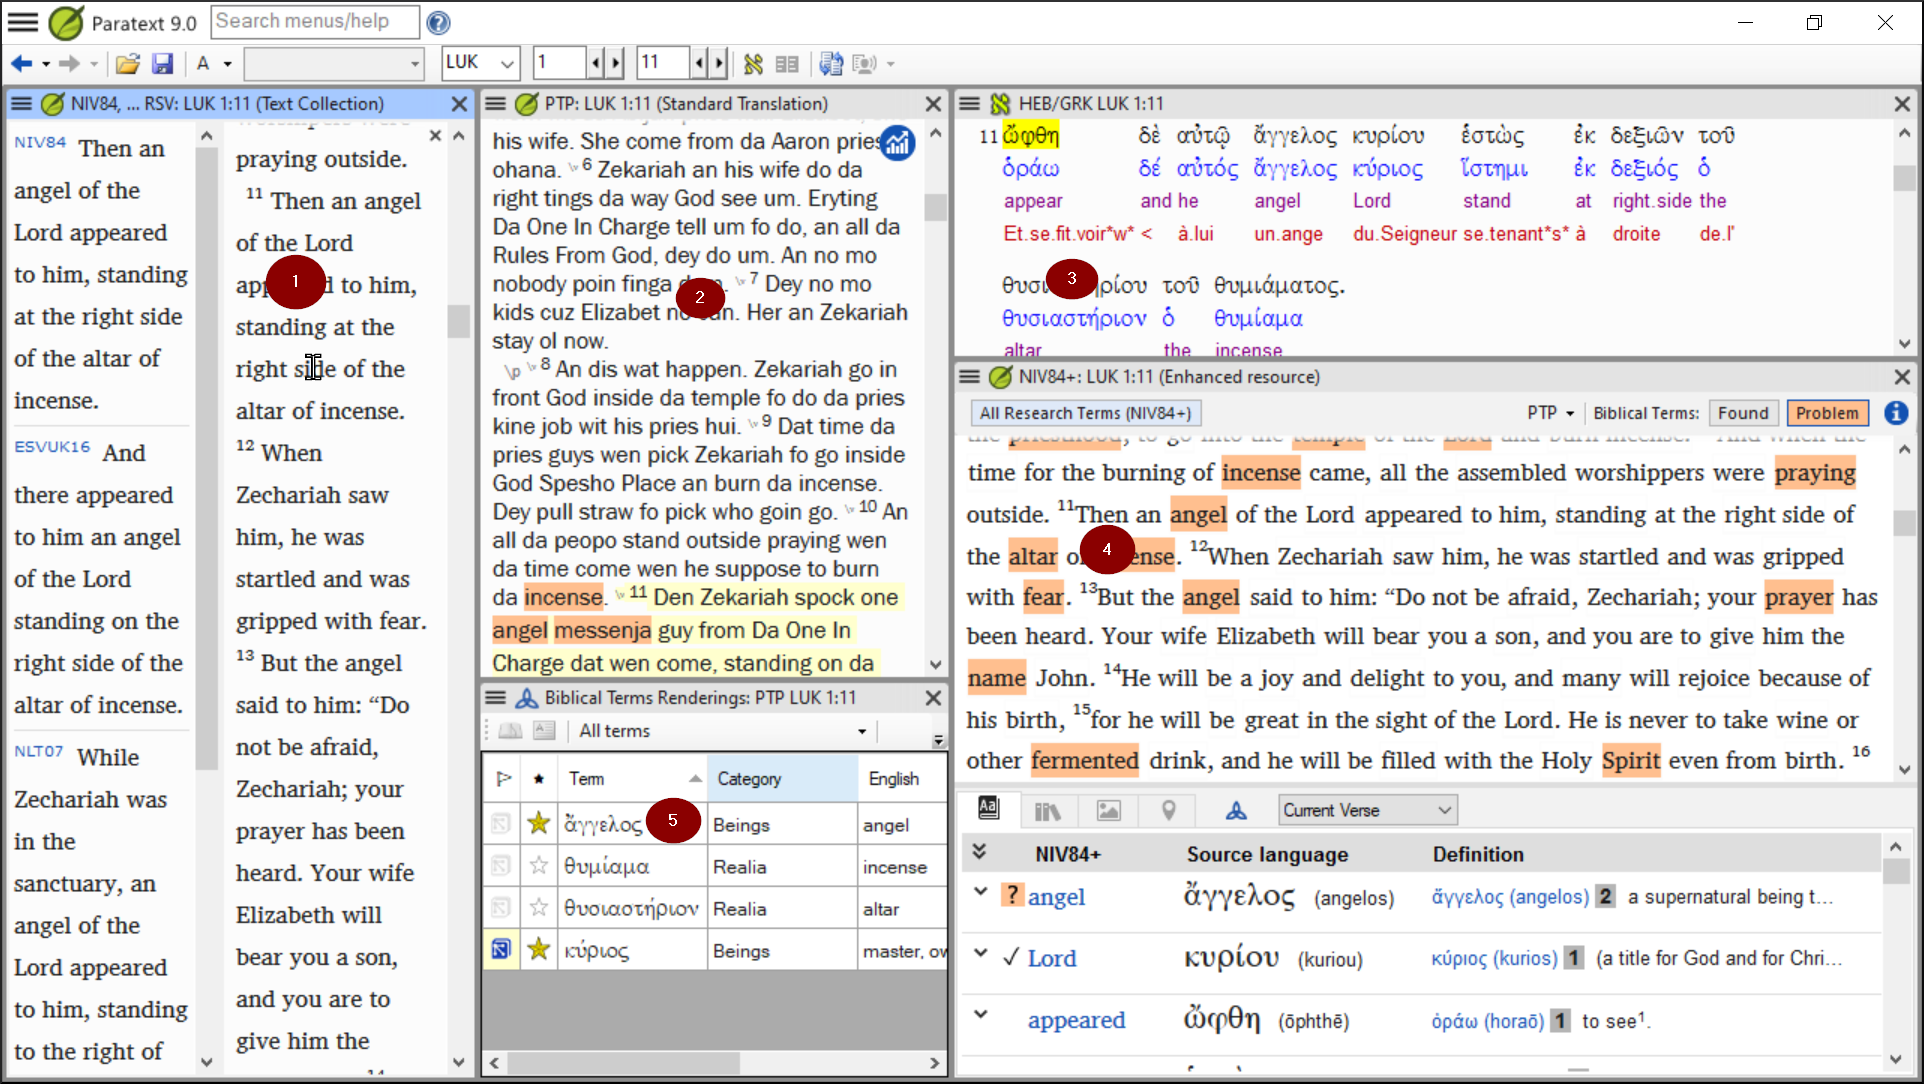
Your screen should look something like the picture below (if not, see below).
2.3 Create a new text layout
If you haven’t already saved a layout, then we recommend you do the following:
Open and arrange the windows
- 1= Text collection
- ≡ Paratext menu, under Paratext choose Open Text Collection, select several resources, click Right arrow button, click OK. (See 2.5)
- 2 = Your project
- ≡ Paratext menu under Paratext > Open, Projects
- 5 = Renderings
- ≡ Tab menu, under Tools > Biblical Terms renderings
- 3 = Source text
- ≡ Paratext menu, under Paratext > Open > Source language text
- 4 = Enhanced resource
- ≡ Paratext menu, under Paratext > Open > Enhanced resources
- Arrange the windows as desired. Watch Paratext videos 0.2.1b, 0.2.1c, and 0.2.3d.
In Paratext 9.3 (and above) you can use the main Paratext menu to arrange windows by rows and columns.
Remember to save your layout!
Save the layout
Once the windows are arranged as desired:
- ≡ Paratext, under Layout > Save current layout
- Type a new name
- OR to replace an existing layout,
- Click the dropdown to the right
- Choose the name of the saved layout.
- Click OK
2.4 Delete a text layout
If you want to delete a saved layout,
- ≡ Paratext under Layout > Manage layouts
- A dialog box is displayed with a list of all the saved layouts
- Click the three dots to the right of the name of the saved layout.
- A submenu is displayed.
- Choose Delete from the submenu
- A dialog box is displayed warning you that you will delete the layout
- Click Delete again to confirm.
2.5 Open resources in a Text collection
In 9.4, Paratext can notify you when there are updates to any of your resources.
- On the Download/Install resources dialog, below the list of resources
- Click the dropdown list beside “Check for resource updates”
- Choose how often to check
- If a resource has changed, a green dot is shown on the Paratext menu icon.
For more details, watch What's new main menu.
With Paratext, it is possible to have several project/resources open at the same time. However, rather than having too many windows, it is better to have several texts in one window.
In Paratext 9.3+ the Text Collection can also be opened directly from the ≡ Paratext menu
New method - Open directly from Paratext menu
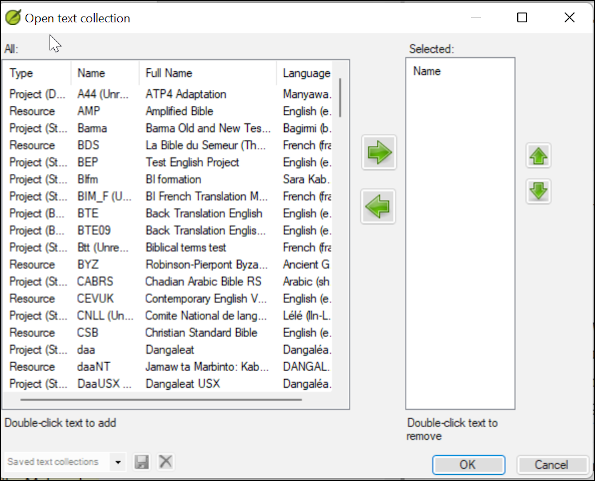
- ≡ Paratext menu, under Paratext > Open text collection
- Select several resources using the Ctrl key as you click on the resource.
- Click on the Right-arrow button.
- The resources are listed in the Selected column.
- Repeat as necessary.
- Use the up and down arrows to reorder them as needed.
Save the collection
- Click in the text box in the bottom left corner.
- Type a name for the saved collection and click the save icon
- Click OK.
- The text collection opens.
Previous method - Open dialog
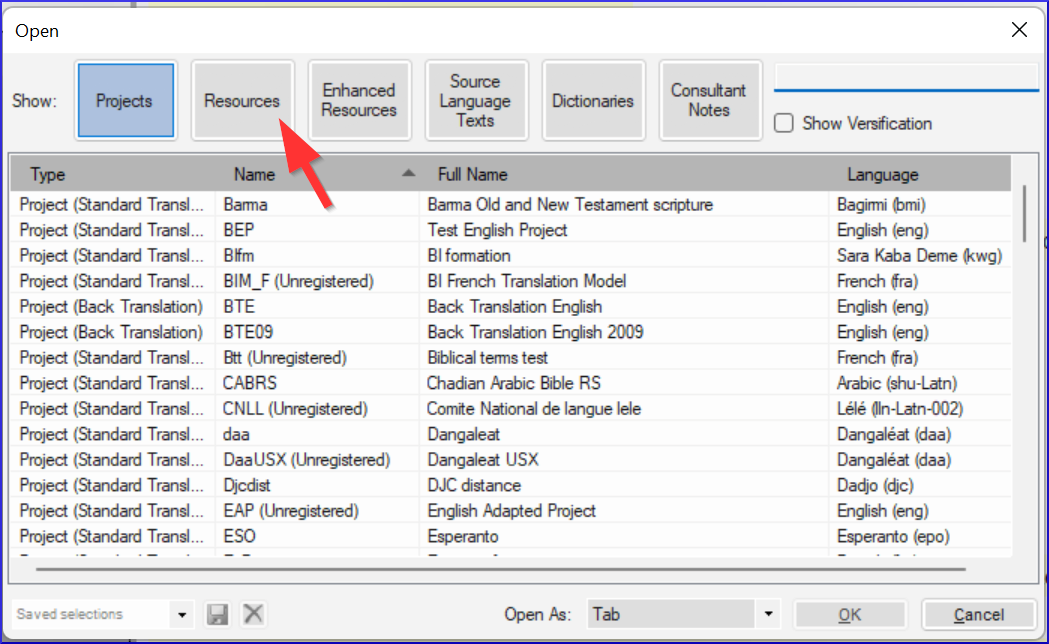
- ≡ Paratext menu, under Paratext > Open
- Click on the Resources button (at the top).
- Select several resources using the Ctrl key as you click on the resource.
- Repeat as necessary.
- Click on the Open as dropdown list.
- Choose Text collection panel
- Click OK
It is suggested that resources be displayed in the order of more literal to less literal (to focus on the texts that are most faithful to the source texts). For English resources: ESV, RSV, NIV, NLT. For French resources, the following order is suggested: TOB, NVSR78Col, NBS, BDS, FC97, PDV11.
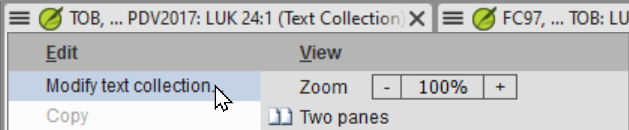
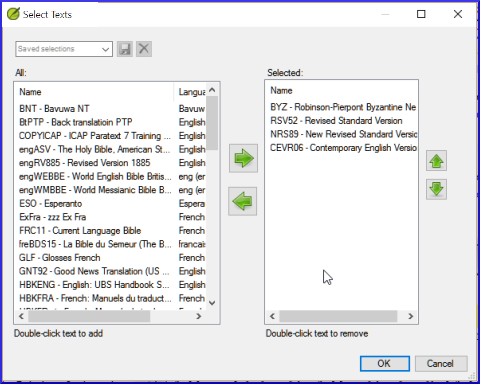
There are several ways to change the order of texts in the collection
- ≡ Tab, Modify text collection
From the Select Texts dialog
Use the arrow buttons to change the order as necessary
Make any other changes
Click OK
You can change the text in the second pane by clicking on the blue link of the abbreviation for the text. You can also use the ≡ Tab under View menu to change the view (preview, unformatted or standard).
2.6 Open an Enhanced Resource
≡ Paratext menu, under Paratext > Open
Click on Enhanced Resources
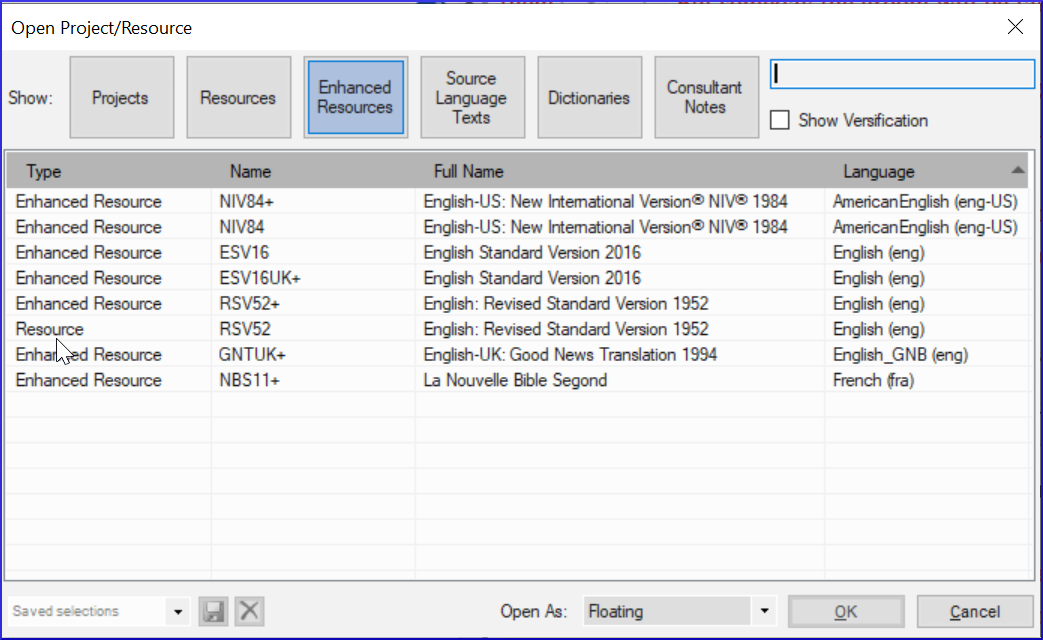
Enhanced resources also contain a dictionary, images, maps, videos, etc. When you open an Enhanced Resource, a guide opens as well.
In 9.4, Paratext can notify you when a resource has been updated.
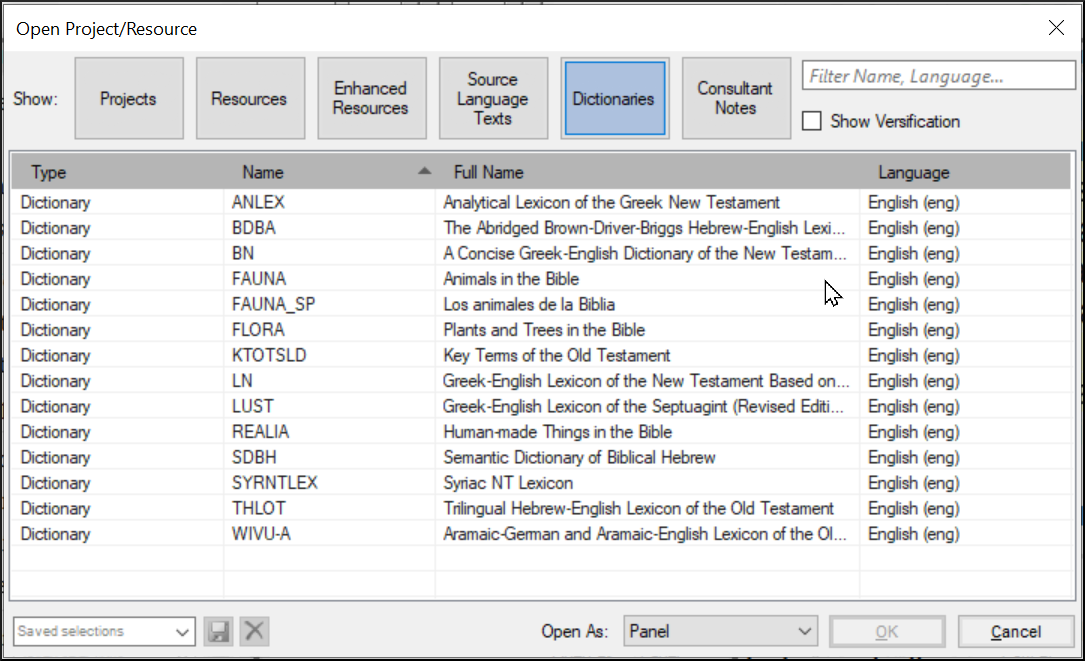
2.7 Open a dictionary
If you do not use an enhanced resource, you can open a source language dictionary with glosses in other languages.
≡ Paratext menu, under Paratext > Open
Click Dictionaries
Choose “A Concise Greek-English Dictionary of the New Testament” OR “Trilingual Hebrew-English Lexicon of the Old Testament”
Click OK
View > choose a language (e.g. French)
It is useful to add dictionary windows to the autohide, (right-click on the tab name, choose move to autohide).
Other dictionaries (in English but with photos)
- "Plants and Trees in the Bible"
- "Animals in the Bible"
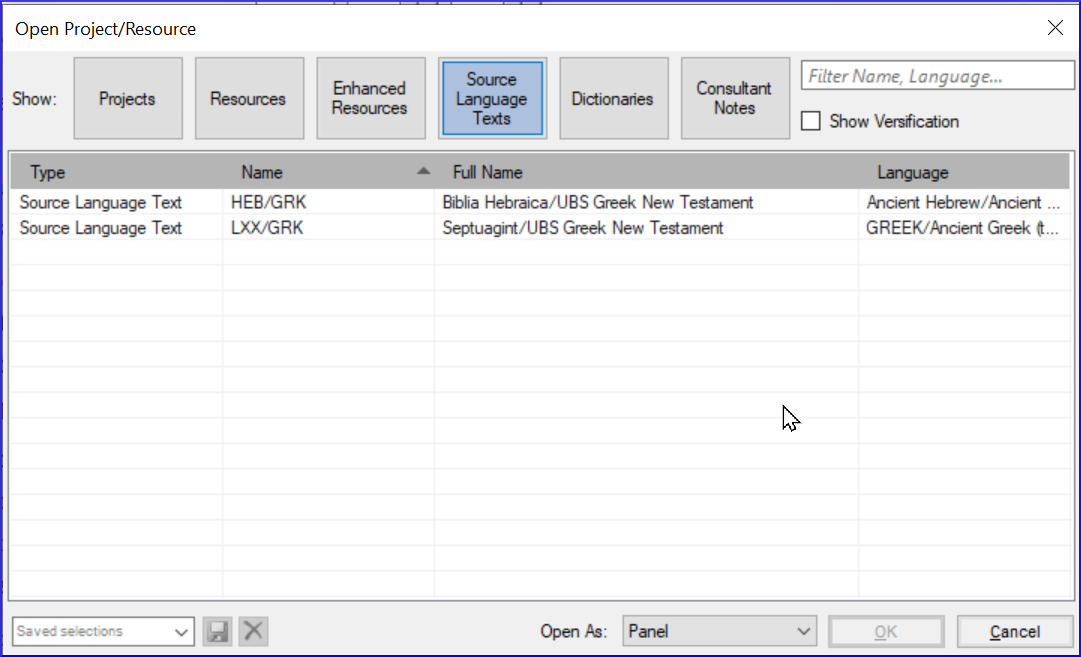
2.8 Working with the Source language text
You can open the source language text with glosses in an alternative language than English, e.g. Gloss FR.
≡ Paratext, under Paratext > Open
Click Source Language Texts
Choose HEB/GRK
Click OK.
If you have downloaded the special gloss resource, you can load them as follows
- ≡ Tab under View > Additional glosses
- Choose the specific resource that has the glosses (e.g. GlossFR)
- Click OK.